How to Improve Productivity in Flutter Teams with a Storyboard.
I will not lie when I say that Flutter comes really easy for us and lets our imagination run wild on the canvas. And the hot reload…


I will not lie when I say that Flutter comes really easy for us and lets our imagination run wild on the canvas. And the hot reload features come to really help when we need to iterate fast enough to approve the design-to-app cycle. Although this is done fast enough, we still need to keep the design intact and any change to the implementation has to go through the approval process again.
Before we start, I want to point out what are you in for. A storyboard is a place where you can place all your app widgets and use them as-is in your application.
Okay, let’s start?

Okay, I hear you. I am going straight in! You want the BORING style. Let’s have it.
Features of the Flutter Storyboard:
- Reduction in time of Review process.
- Easy and fast Design-to-app process.
- Verify how your widget will react to changing themes.
- Copy the code of the widget for easy implementation [TODO].
Resources:
- Flutter Storyboard Playstore Link (Don’t forget to give a nice review)
- Flutter Storyboard Github Repository (Don’t forget to star it)
- Flutter Storyboard Web Application (Don’t forget)

I couldn't finish 9 lines like this. I like being DRAMATIC. I am sure you are going to want to read this to the end. Thank me later.
The Problem:
After a lot of UX and UI studies and research, our design team finalized a design pattern and a hell lot of screens. Our application was to be made from scratch and all the screens were being re-thought and re-made. And this had to be implemented in Flutter, all from scratch.
We started out with building common elements of the application and started the review process of the widgets that were built. The review process went fine.
But some changes were introduced by the business team and had to be inculcated in the Design Process and the implementation. This meant that we had to go through the review process again. And if more changes were to come this would become a hell lot more difficult and time-consuming and almost impossible to complete the given tasks in the running sprint or the tasks had to be moved to backlog.
The Solution:
We searched for solutions but couldn’t come up with anything. And so we decided to build something of our own. Just like React has its own Storybook, we decided to build something like that for mobile (And for Web). This would make the process of review easier for the design team to see their design in action and for the dev team to let the burden off their shoulders.
Solution Part 1:
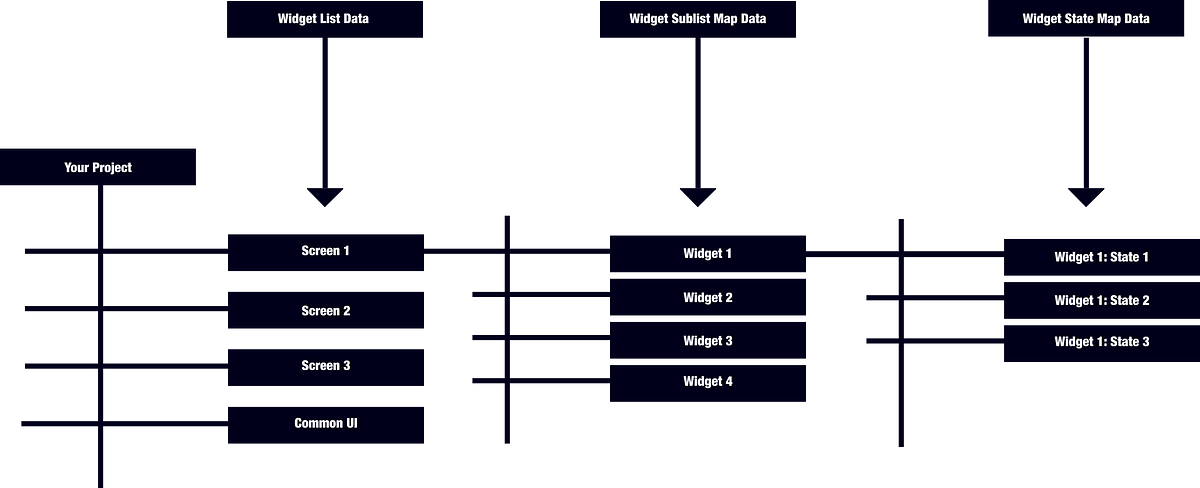
First off, we decided on how the Widget Structure would be laid out so that it becomes easier for review and understanding. And so we came up with this structure.

Our project will consist of multiple screens, namely Screen 1, Screen 2 and so on (aptly named) and some Common UI Widget that will be shared across multiple screens. And under each screen, we will have the desired components that we need that make up that screen, namely Widget 1, Widget 2 (aptly named too). And each widget will have different states.
Example:
Our major problem was solved but this solution design was still not good enough. We had another thing coming.

Solution Part 2:
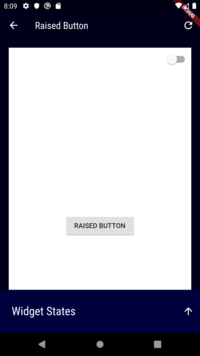
Dark theme is on the rise and we wanted to see how any particular widget and its state would react in the dark theme and light theme in an isolated environment. What we wanted to do was that the widget should be able to adjust itself according to the chosen theme while the theme of the whole app is not affected.
We don’t want to go to the settings screen, again and again, just to see how the widgets are changing
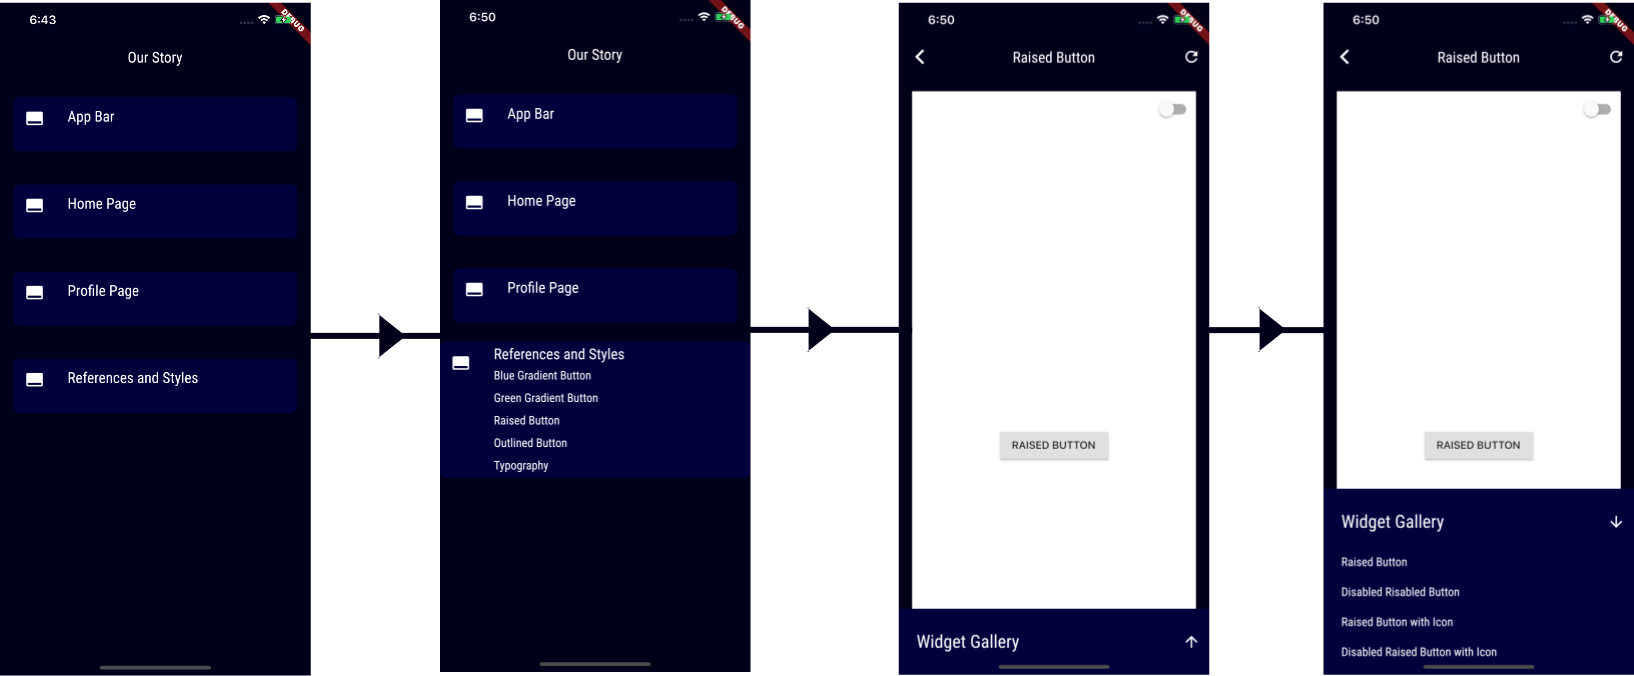
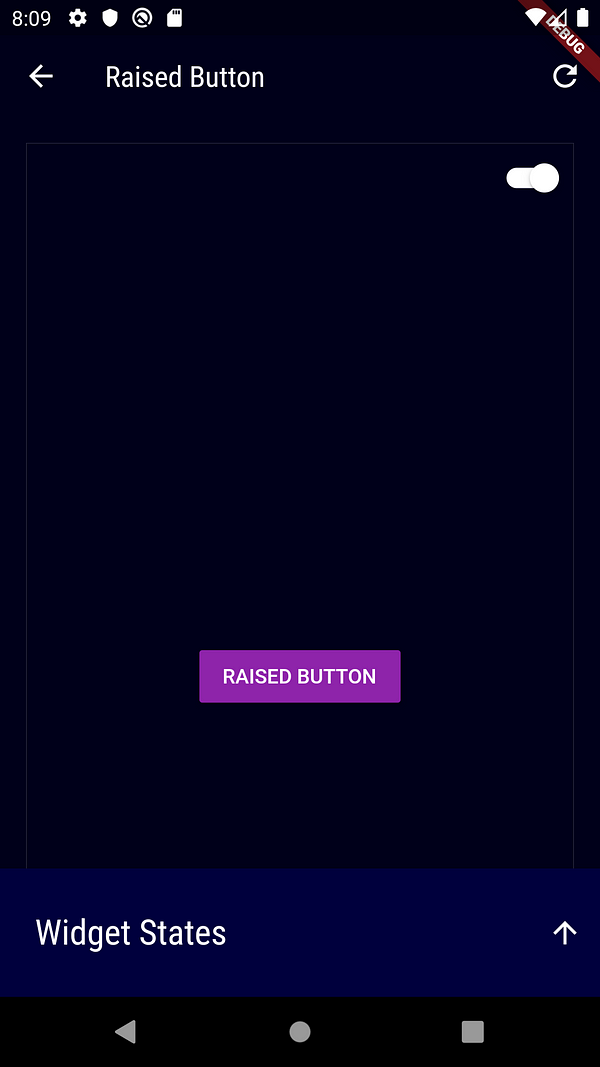
Storyboard theme and the theme of the app for which widgets were being built had to be separated. So we decided to build a dynamic theme switcher that could change the theme of just the required canvas and we could see the results without going to the settings screen. So we added a switch on top-right of the screen that would allow us to change the theme and let the storyboard app do the rest.
Just define your own theme and the rest will be taken care of. The result was as shown:

How to do it?

Okay, there is a minimum of 3 Steps.
Step 1: (Opening files)
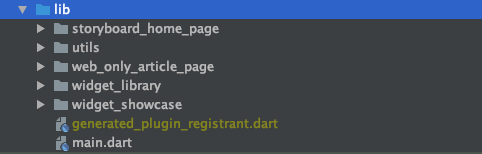
Open the project in Android Studio, after forking the project or downloading it from here. Open the lib directory and you can see many directories, out of which only widget_library concerns us. Open it.
After you have done it, you’ll see something like this.
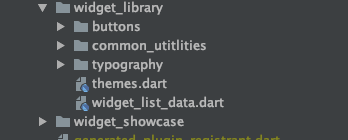
Then open the file named: widget_list_data.dart where you’ll see 3 classes in the same class. All these classes store maps.1. WidgetListData . /// This map stores the name of the heading widgets
2. WidgetSublistMapData . /// This map stores the Widgets
3. WidgetStateMapData . /// This map stores the states of Widgets
Don’t get confused. Let’s revisit this diagram again, with a little addition:
Step 2: (Understanding what this file is)
- Widget List Data: This map stores the main headlines of the widget. Like in our case it is the name of the screen, and basic Utilities in a name-value pair fashion.
2. Widget Sublist Map Data: This map stores the Widgets that make up a screen. Like home-page will consist of an app-bar, side-menu, bottom navigation, some dividers, and much more, all that is necessary.
3. Widget States Data: This map stores the states of a widget. Like an app bar can contain a back arrow or not, or some actions in the right-end.
Step 3: (Adding the Widgets)
- Adding Headings: widgetListMap contains your headings, like Screen 1, Screen 2. Just edit to add more screens.static Map<String, Map<String, Map<String, Widget>>> widgetListMap = {
"Screen 1": WidgetSublistMapData.appbarWidgetsMap,
"Screen 2": WidgetSublistMapData.homePageWidgetsMap,
"Screen 3": WidgetSublistMapData.profilePageWidgetsMap,
"Common Utilities": WidgetSublistMapData.referencesWidgetsMap
};
2. Adding Subheadings: You can see that Screen 2 is connected with homePageWidgetsMap. And it contains the sub-headings.static Map<String, Map<String, Widget>> homePageWidgetsMap = {
"Home Page's App Bar": WidgetStateMapData.appBarStateMap,
"Side Menu": WidgetStateMapData.sideMenuStateMap,
"Bottom Navigation": WidgetStateMapData.bottomNavigationMap,
"Helper Toolbox": WidgetStateMapData.helperToolboxMap,
"Custom Divider": WidgetStateMapData.customDividerMap,
"Shimmer Layout": WidgetStateMapData.shimmerLayoutMap,
};
3. Adding States: Now you need to add states to each subheading widget. You can see that appbarStateMap is filled with states and Widgets.static Map<String, Widget> appBarStateMap = {
"App Bar State 1": Container(),
"App Bar State 2": Container(),
"App Bar State 3": Container(),
"App Bar State 4": Container(),
};
Run the app and see magic!

And don’t forget to clap if you like and comment if you have any queries, or generally appreciate, maybe? Oh yes, we can clap more than 1 time!